Something I did not include on my previous post was why I chose the main components, outside of making them seem like a requirement. I more glossed over them as if they were set out before I started (they weren’t). So as well as covering the new features added in January, I’ll also explain some of the reasoning behind my choices in components.
Building an app
Since last month, the majority of changes have been made in how the data is handled for the user. Moving from using serial to process the data using a jupyter notebook, to using a mobile app and communicating over bluetooth. This makes it easier and faster to see, at a glance, the apogee of the flight, its duration, and the flight curve.
The actions taken when I fly with eALT is as follows:
- Pad up, switch on the board, and connect to it to make sure it is running
- Press the button to switch to standby, and go back to the launch controller
- Press launch, and watch the flight
- Go to the rocket, open the app, and without pressing anything the flight curve appears!
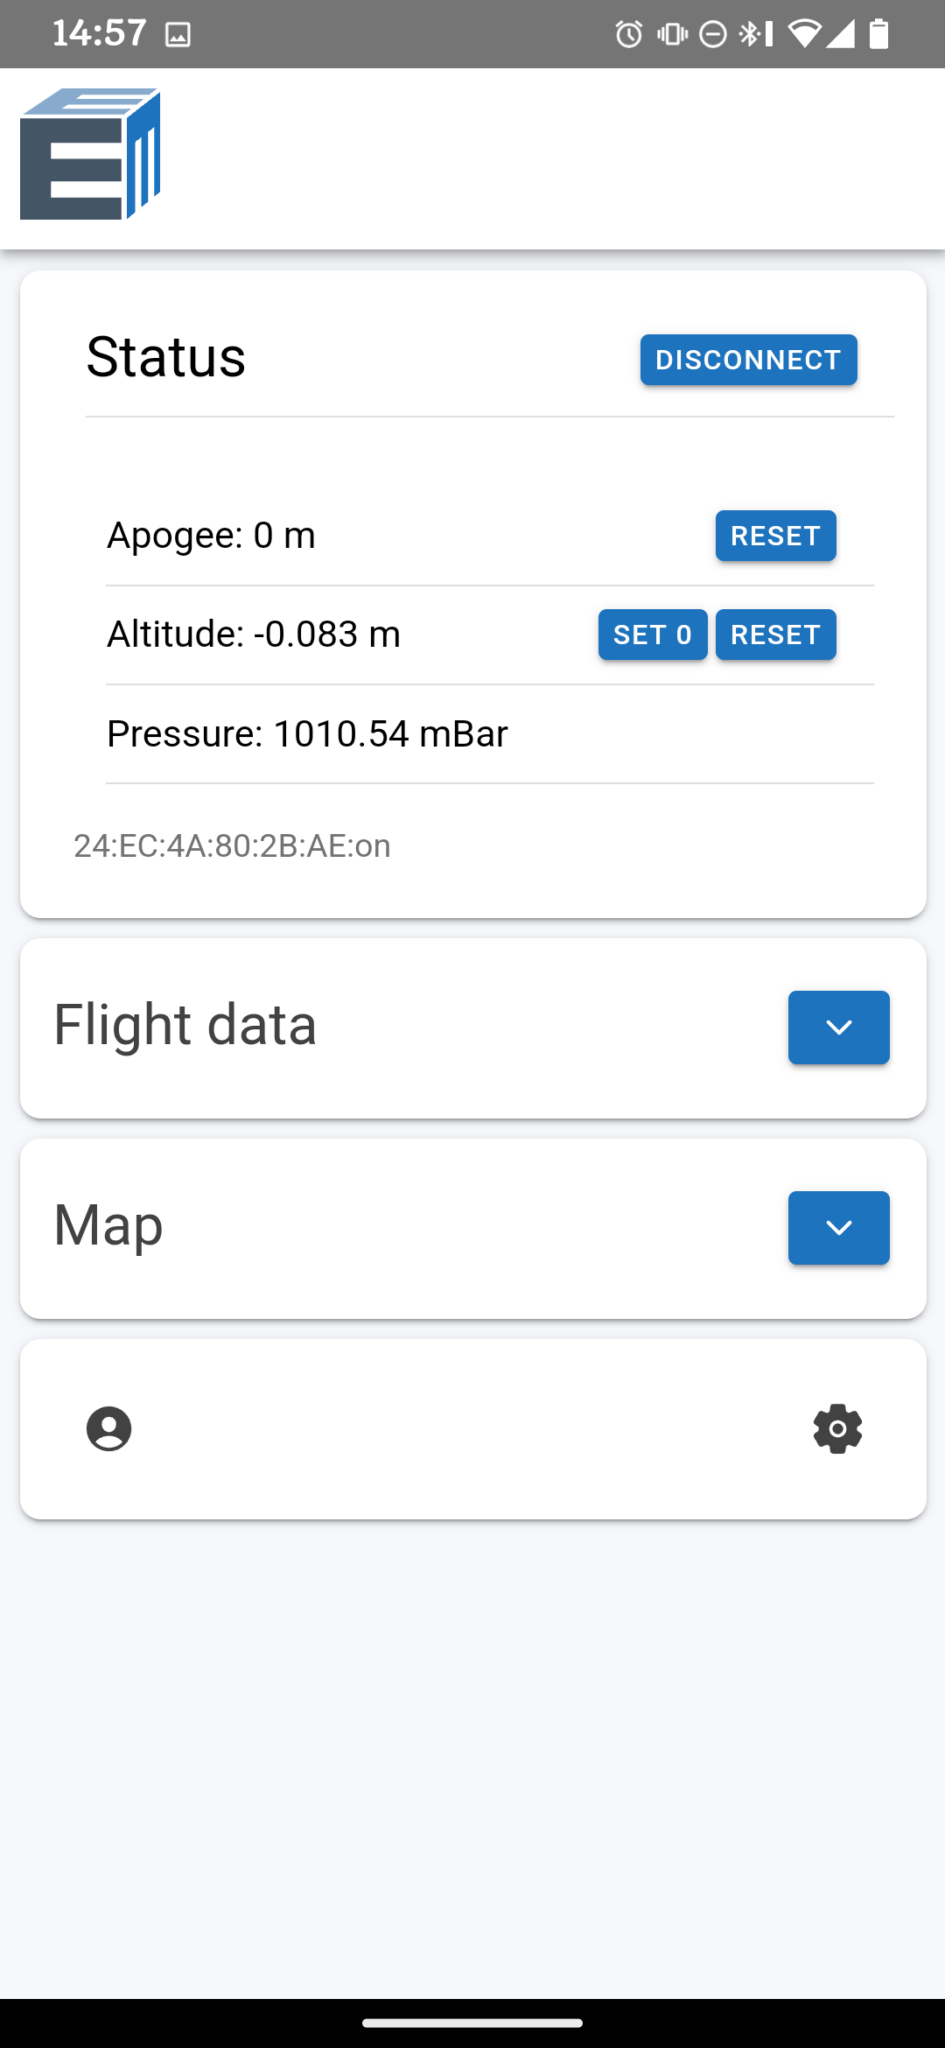
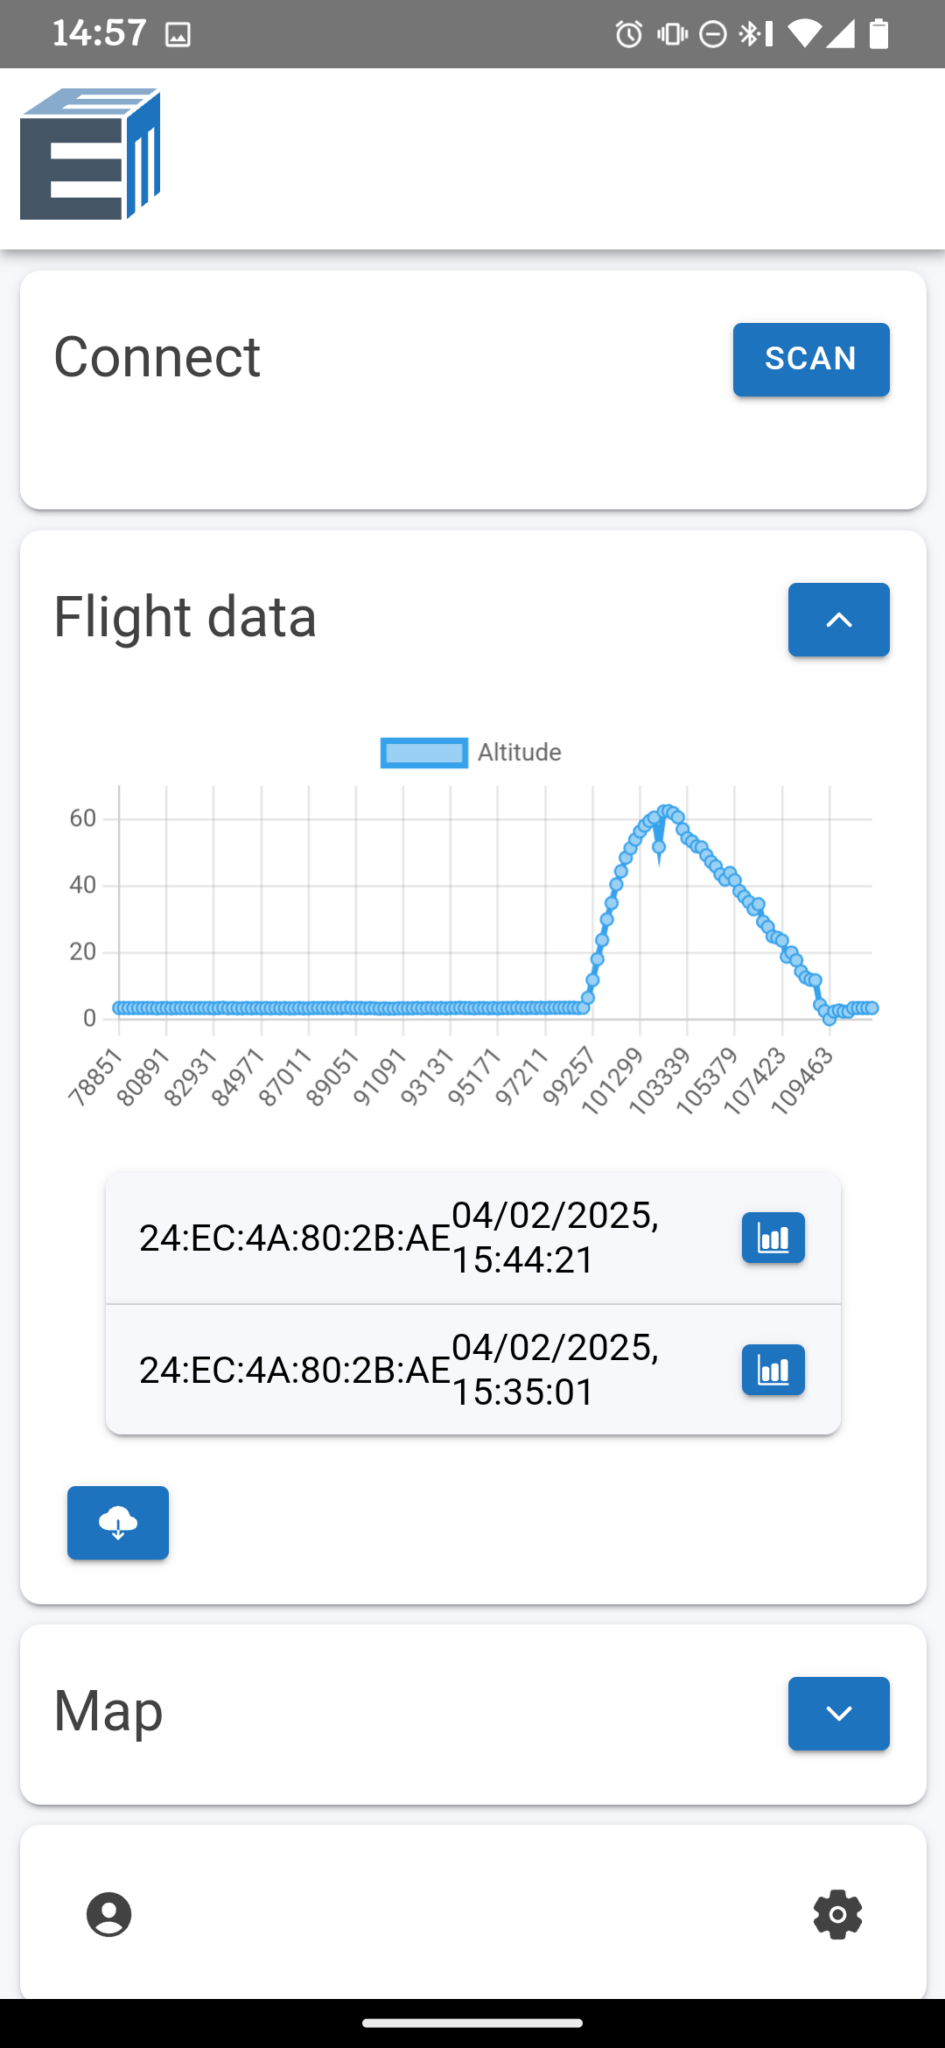
The app has a lot of features but to summarise it can connect to eALT and get some basic status info: pressure, temperature, current state. When it sees that there is a flight available, it will automatically try to download it, and delete it when it is finished. The flight curve is then shown in the app with a history of every flight downloaded. Downloading in displaying the flight only takes a second or two.


The majority of this app was built by my Dad, and we worked together to get the data transfer protocol to work.
Choosing components
One of the main focusses I had when designing this board was giving it lots of features for a similar price to already available components. Which is how I decided to use the components I did.
For the altimeter/barometer, the DPS-368 has several desirable features. It has a high polling rate, up to 110Hz and high accuracy, within ±10cm at that rate. Originally, I had planned to use a BME280, however its low rate was not what I wanted for flying in rockets. The switch between the two was relatively easy as they have the same footprint.
For the microcontroller, the ESP-32 was chosen for several reasons: I had used it before, it had built in networking capabilities, and was tiny even when in a module. These all suited the project well, as at the start I had almost never used KiCAD or programmed any form of microcontroller.
Flight testing
Since last time, I have successfully completed 2 more test flights, testing different things.
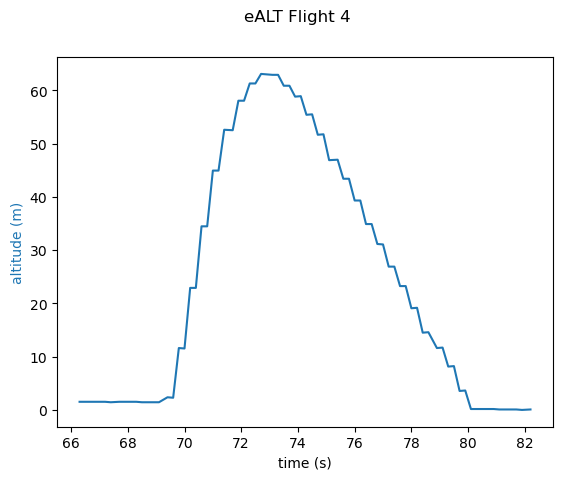
Flight 4 was used as a first test for the app, so the flight curve looks the exact same, just as jagged and high. It was the same rocket and motor as Flights 2 and 3, so not very interesting. Unfortunately the app didn’t actually work, so here is the jupyter output instead:


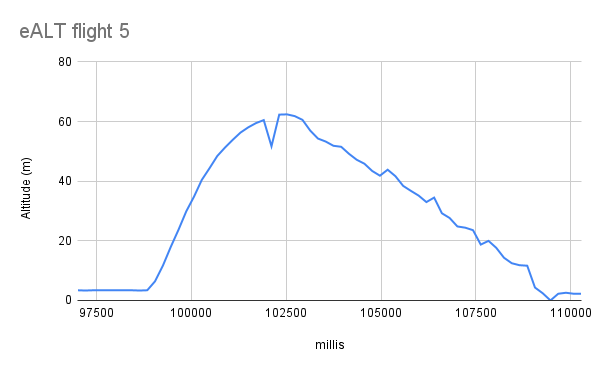
Flight 5 was a test of two things, a faster DPS polling rate and the newest version of the app. And from the image above, and the earlier screenshot, it all worked. The data is now collected at 10Hz, so the curve is significantly smoother. The blip in the data near apogee is when the ejection charge went off; the current holder does not separate the two section so the pressure travelled through and popped the nose cone off!
This flight was also in quite bad weather, so a parachute was not used. The fluctuations is altitude seen on descent are due to the rocket being blown around in the wind.
Overall I think this month has been quite successful.
Leave a Reply